Adding cascading sub-menu to {Windows|File} Explorer context menu
Preface
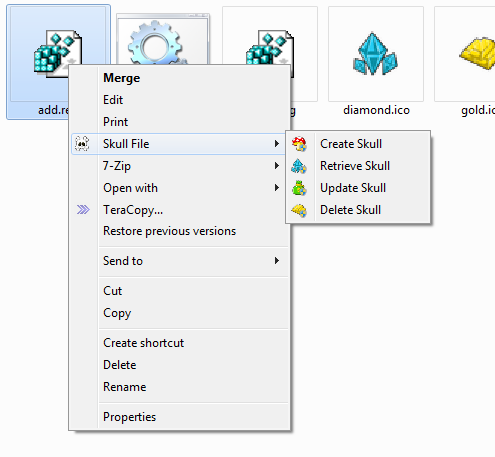
I have always been curious how to add cascading sub-menu or menu options to the Windows/File Explorer’s context menu. Just in case you have no idea what the context menu I am referring to, it’s the when you right-click the mouse button or press the Menu key or Shift-F10 in Explorer, with or without an item highlighted/selected.
As a developer, this can be useful to add some convenient shortcuts to activate my own applications to do something useful. It can even be used to activate a PowerShell script or batch file that does something useful.
When used properly by binding to the right object or item in Explorer, custom applications can be made to act on files, folders, libraries or even in the empty space. This is especially useful when our application can perform user actions on files, folders or disk drives.
Before going deep down the rabbit hole…
For normal users who just want to make modifications to their context menu, there are many free context menu editor software tools that do this in a more user-friendly way, without the need to understand the gory technical details that go on in the Windows registry to make this happens.
Just use them and get on with your life.
For most normal people, you do not need to know or understand this.
This is more for techies (developers and system engineers) who want to know how to hook their software into Explorer.
Adding a cascading sub-menu in context menu
Referencing information from LittleMissGoth’s blog post, I tested 2 ways of adding a custom cascading menu, with options that executes a batch file that simply prints out the command line arguments it receives.
If successful, this can be used for starting other Windows .EXE applications.
NOTE: I have not added the sample icons into version control. You can use
your own .ico format icon files which you can download from the Internet or
extracted from your own system.
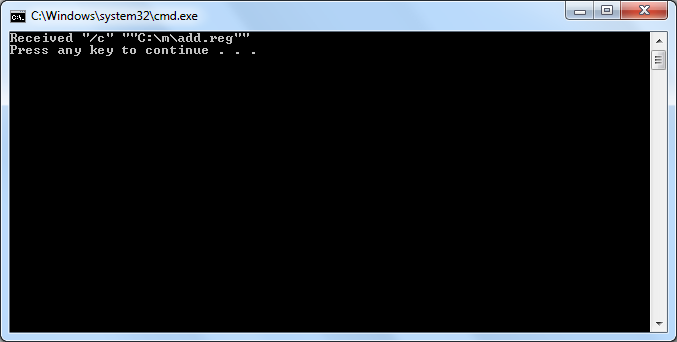
Command line tool: C:\Windows\System32\reg.exe
add.cmd demonstrates the command line calls to create the necessary registry keys and values.
The corresponding delete.cmd removes and cleans up the registry keys and values.
Registry file
add.reg demonstrates the configuration to create the necessary registry keys and values.
The corresponding delete.reg removes and cleans up the registry keys and values.
Other methods
There are other methods of manipulating the Windows registry, such as via the Windows API with C/C++, Windows Management Instrumentation (WMI), PowerShell script, Windows Script Host and even other scripting languages e.g. Java JNA, Python and Perl that has a WinAPI binding.
I only experimented using the command line tool and registry file for simplicity.
Reasons for testing and documenting context menu modification
I created these sample files as a tested working proof-of-concept and as a concise reminder of the registry keys and values since I always forget them. As a software developer/engineer, this may come in handy one day when it comes to integrating my software into Explorer.